Can’t wait for installation day now that you’ve ordered your brand-new doors and windows? We understand! There’s nothing like stylish, new—and energy-efficient—windows to give your house a completely different look. How should you be planning ahead for installation while you wait for the delivery truck to arrive? Here are four steps we recommend taking to minimize the chances of any unpleasant surprises and ensure that all goes smoothly.
STEP 1 of the door and window installation process: Choose the installers
When you signed the agreement with your supplier, you probably made the decision to have your doors and windows installed by either its in-house installation team or someone else. If you’re getting a new home built by a contractor, that company looks after arranging the installation. You also have the option to hire your own installers or do it yourself. That said, there are advantages to using the installation service provided by the manufacturer that go far beyond simple convenience:
- Proper installation maximizes the energy performance of your doors and windows and prevents premature wear on device mechanisms.
- The installers are certified, meaning that they’re licensed contractors under the Régie du bâtiment du Québec.
- Expertise: professionals have the training, experience and know-how required to perform installation in accordance with standard industry practice.
If you do opt to install your doors and windows on your own, be sure to consult the general requirements section in the Guide chantier document [in French only] on window installation following Canadian Standards Association standard CSA A440.4-07. Of course, all Vaillancourt retailers are equipped to install your purchases, as is our team of approved installers.
STEP 2: Get ready
After choosing an installer, all you need are the products you’re having installed. Has the manufacturer confirmed an exact delivery date? At Vaillancourt, our customer service team reconfirms with all clients to ensure timely delivery. Although it’s possible to install doors and windows any time during the year—yes, even in the middle of winter!—certain weather conditions can have an impact on the delivery or installation date or how long the work takes.
Before the installation team arrives at your house with its trailer and tools, take these minimum precautions:
- Does your municipality require that you obtain a permit or authorization before proceeding with the work? If so, you are responsible for getting one.
- Remove all window and door treatments, including blinds, curtains, sheers, shutters, panels and even curtain rods.
- Do you have any pets roaming the house? Be sure to move them to a secure place, as the installers will be opening your front door frequently.
- Is your property protected by an alarm system? You should ideally advise the company or have it temporarily disconnected.
- To protect and extend the life of your belongings, cover valuable items, and relocate any objects sitting in the immediate proximity of work areas both indoors and out (indoor and outdoor furniture, lights, plants, decorations, garden hoses, etc.).
- If your yard is fenced, ensure that the gate is unlocked and the backyard is accessible.
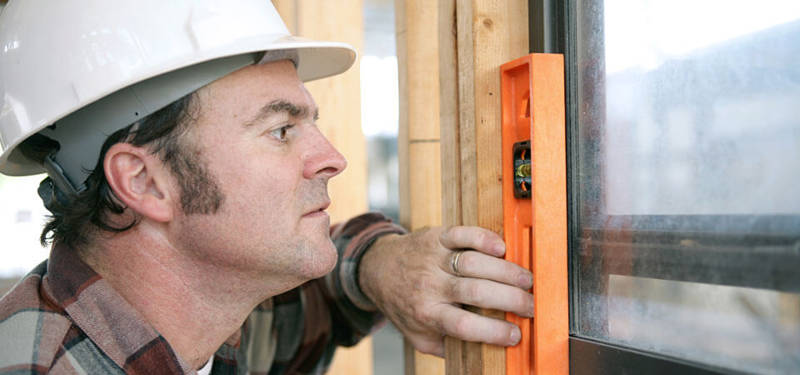
STEP 3: Installation day
Before the truck arrives, ensure that a parking spot is free near your front door. The installers will have to go back and forth to their truck carrying tools and heavy items.
An adult from your household must be present. This person should feel free to ask the installation team any questions they may have—the installers are there to help!
Depending on the season, the interior of the house may temporarily become warmer or cooler, or insects may enter. Since this is a renovation project, there will inevitably be noise and the work will generate a certain amount of dust. However, every effort will be made to keep this to a minimum as the doors and windows are replaced one at a time as follows:
- Remove existing door or window
- Inspect and prepare opening
- Position and install new product, ensuring it is level, square and plumb
- Insulate and finish
STEP 4: Finishing up
When the job is done, the installers will, wherever possible, tidy up the work areas to ensure they leave your home the way they found it. A seasoned installer will take the time to inspect all new doors and windows with you. They will also ensure that you know how to operate the new products and may even provide some cleaning and maintenance recommendations. To prepare for this final step:
- Do you know what you intend to do with your old doors and windows? Have you arranged for the installers to look after this? Will your local environmental depot accept them?
- Make time for reinstalling all your door and window treatments, keeping in mind that this is also the perfect opportunity to update them!
- Expect to need to also make a few minor paint and esthetic touch-ups around door frames.
Planning ahead by following these few steps is sure to make the installers’… and your own… job easier. If any additional questions come to mind, don’t hesitate to reach out to your after-sales service representative at the manufacturer. Who you need to speak with depends on where you are in the purchase process, but someone will be pleased to respond to your inquiries regardless.
Other articles in this category
- Minimum requirements and dimensions for bedroom windows
- What Factors Affect the Cost of Windows?
- Securing Your Doors and Windows
- Purchasing doors and windows: The process and how we can help
- Choosing the right colour for your windows: 4 tips to guide you
- What type of window should I choose?
- What material should I choose for my windows?
- What kind of budget should I set aside for purchasing doors & windows?
- Taking accurate measurements: a must when shopping for doors and windows
- 6 things you should know when purchasing windows
- Tips from a pro: choosing new windows